Basic Self-Hosting Security
This section will cover some basic security configurations and practices for self-hosting.
Table of Contents
- Introduction
- Implementing a Firewall
- Using SSH Keys\
- Implementing CrowdSec
Introduction
There are many different methods that can be used to protect any machine, not only servers against attacks, keeping them secure.
Some examples will be implementing a firewall, using SSH keys, and having an anti-malware solution in place.
This section will be using Debian 12 as an example. The following will be covered:
- Implementing a Firewall
- Using SSH Keys
- Implementing CrowdSec
The steps covered here are only the basics. More advanced configurations can be found in other sections such as Advanced Self-Hosting Security or reading the application's manual.
The commands used here will be done on Debian 12.
Implementing a Firewall
On Debian, we can use Uncomplicated Firewall (UFW). UFW is a firewall solution that can be installed on distributions such as Debian. To install it, run the following command.
sudo apt install ufw
The configuration file for the firewall will be at /etc/default/ufw. This file contains settings such as enabling IPv6.
Before starting the firewall, we can add some basic rules. By default, UFW blocks all incoming connections and allow all outgoing connections. This means that anyone attempting to connect will be denied while still allowing us to connect externally.
To add a default rule, we can specify the direction and the action to take.
sudo ufw default <allow/deny> <incoming/outgoing>
It is good practice to specify to deny all traffic even if it is default behaviour. We can use the following command to do this. The same steps can be applied for outgoing traffic.
sudo ufw default deny incoming
If we enable the firewall now, it will block connections such as SSH, essentially locking us out of the machine. To avoid this, we can add an allow rule to allow SSH traffic.
To add an allow rule, we can either specify the application or the port. To view available applications, use the sudo ufw app list command. The following commands are some examples of adding an allow rule.
sudo ufw allow <application name>
sudo ufw allow <service name>
sudo ufw allow <port number>
For SSH, we can use either of the following commands to add it as an allow rule.
sudo ufw allow ssh
sudo ufw allow 22
The above commands will either allow it by the service name or the port. By default, SSH runs on port 22.
Once all the rules have been added, we can view the added rules with the following command.
sudo ufw show added
After confirming that the firewall is properly configured with our added rules, we can enable it.
sudo ufw enable
Once active, we can see the rules set using the sudo ufw status verbose command.
To add more rules such as allow incoming HTTP connections for example, follow the steps where the SSH firewall rules are added.
We can also add a specific IP address or subnet range.
sudo ufw <allow/deny> from <IP Address>
sudo ufw <allow/deny> from <Network Address>/<CIDR>
An example:
sudo ufw allow from 10.10.10.11
sudo ufw deny from 172.16.0.0/16
To disable or reset the firewall, we can use the following.
sudo ufw disable
sudo ufw reset
Using SSH Keys
Using SSH keys and disabling password login can help in preventing brute force attacks as a user is required to have the private SSH key to authenticate.
To start, create the SSH keys using the ssh-keygen command. The -b option can be used to specify the number of bits to use. The following command works on Windows and Linux.
ssh-keygen -b 4096
When prompted for a password, enter a password. This makes it where if the private key has been compromised, the user will still have to enter a password before gaining access to the system.
Once the key has been created, it can be located in the home directory in the /.ssh directory on Linux and Windows or %USERPROFILE%\.ssh on Windows. There will be two files called id_rsa and id_rsa.pub. The id_rsa.pub is the public key while the id_rsa is the private key.
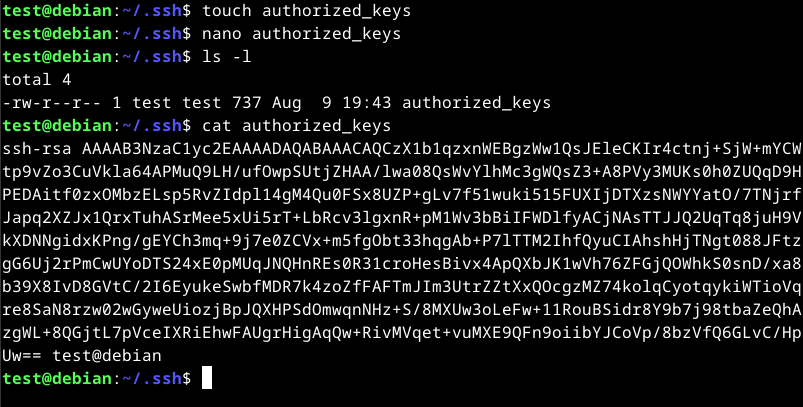
On the remote machine, we can create a directory called .ssh in the user home directory if not already there. In the directory, create a file called authorized_keys and place the contents of the id_rsa.pub file in it.
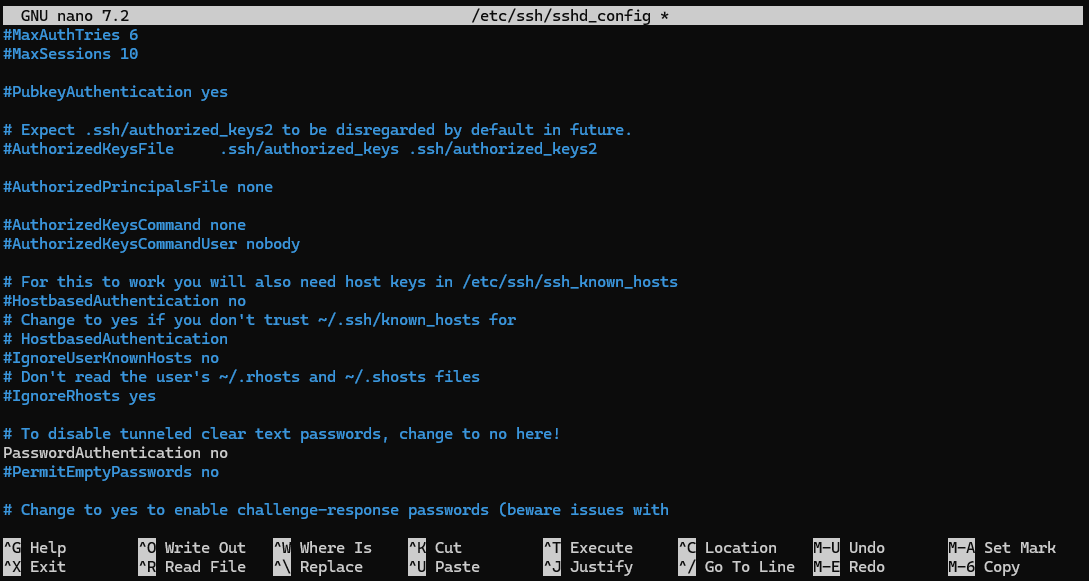
Once added, we can disable password login by editing the /etc/ssh/sshd_conf file and change the PasswordAuthentication setting to no.
PasswordAuthentication no
Once saved, restart the SSH service using sudo systemctl restart ssh. Once restarted, we can login using the key. If required, you can specify the key to use using the -i option.
ssh <username>@<remote host> -i /path/to/id_rsa
Implementing CrowdSec
CrowdSec is an open-source security solution that is able to block malicious IP addresses and act as a IPS in some cases.
CrowdSec works by sharing information with other users anonymously to deter malicious attacks. It also offers many different configurations which can help in blocking attacks such as XSS or SQL injection on the application layer (TCP/IP Model).
To start, we can create a account at https://www.crowdsec.net/. This will allow us to enrol the systems into a centralised dashboard and get more functionality such as different detection methods.
To install CrowdSec, we can use the following commands by CrowdSec on Debian.
curl -s https://packagecloud.io/install/repositories/crowdsec/crowdsec/script.deb.sh | sudo bash
sudo apt-get update
sudo apt-get install crowdsec
Once installed, we can install a remediation component. This example will be using a firewall remediation component. More can be found on their official documentation.
sudo apt install crowdsec-firewall-bouncer-iptables
Once the packages are installed, we can enrol the machine into CrowdSec. To do this, login into their dashboard and navigate to Security Engines > Engines and click the "Add Security Engine" button.

We should be provided the steps to install CrowdSec followed by a command to enrol a system.
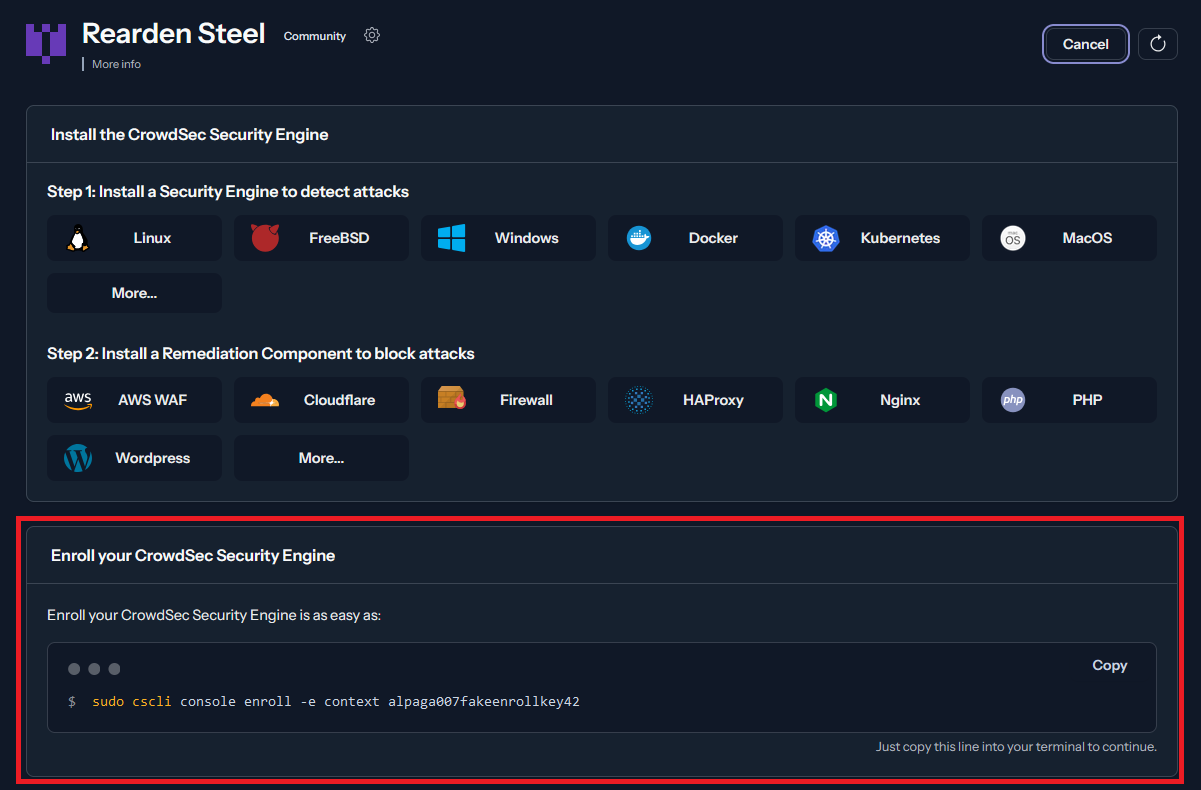
Copy the command and paste it into the machine that you are trying to enrol. Once done, refresh the page and we should be prompted to accept the enrolment.
Once the system has been enrolled, restart CrowdSec.
sudo systemctl restart CrowdSec
Once enrolled, we can start subscribing to different blocklists or download scenarios, collections, or parsers for different application logs and more.